Malted Chocolate Sandwich Cookies

Yield: About 32 cookies
Cook Time: 7-9 minutes
Tips: Chocolate lovers may use chocolate malt powder instead of regular cream-colored malt powder for the cookie filling, if desired.
Malted Chocolate Sandwich Cookies take chocolate sandwich cookies to a whole new level by adding the flavor of malt in the cookie filling. If
you're not familiar with the flavor of malt, malt powder is the ingredient used in malted milk shakes (malted milk shakes used to be very popular, though are not as easily found these days). Malted milk ball candies also have the flavor of malt. Malt powder can easily be found in most grocery stores and come in both original and chocolate flavors. This recipe calls for the original cream-colored malt powder, but if you are a chocolate lover, feel free to flavor your cookie filling with chocolate malted powder!
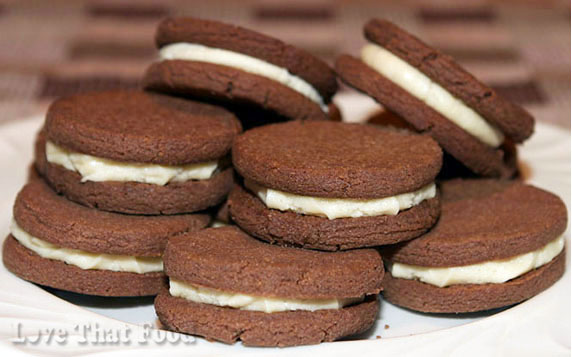
This chocolate cookie recipe uses real milk chocolate as well as powdered cocoa, giving these cookies authentic chocolate flavor and that undeniable homemade quality. Malted Chocolate Sandwich Cookies cookies are crumbly and delicious, while the filling is buttery and creamy with that distinct burst of yummy malt flavoring.
This chocolate cookie recipe uses real milk chocolate as well as powdered cocoa, giving these cookies authentic chocolate flavor and that undeniable homemade quality. Malted Chocolate Sandwich Cookies cookies are crumbly and delicious, while the filling is buttery and creamy with that distinct burst of yummy malt flavoring.
Recipe▼
Ingredients
- Cookies
- 1 1/2 sticks (12 tablespoons) butter, softened
- 1/2 cup light brown sugar
- 1/2 cup granulated sugar
- 6 ozs. milk chocolate, melted and slightly cooled
- 1 tablespoon vanilla extract
- 1 3/4 cups all-purpose flour
- 2 tablespoons unsweetened cocoa powder
- 1 teaspoon baking soda
- 1/2 teaspoon salt
- Filling
- 1 stick butter, softened
- 1/2 cup malt powder
- 1/2 teaspoon vanilla extract
- 2 cups confectioner's (powdered) sugar
Directions
Cookies
Line 1 baking sheet with parchment paper. Have another piece of parchment paper (same size) ready.
In a large electric mixer bowl, add butter and both sugars and beat until smooth. Add melted chocolate and vanilla and beat again until smooth.
In a small mixing bowl, whisk together flour, cocoa powder, baking soda and salt. Gradually add flour mixture to butter mixture and beat at low speed just until thoroughly blended and smooth. Transfer cookie dough mixture to one of the sheets of parchment paper. Smash down to a somewhat to a flattened shape about 1-inch thick. Place second piece of parchment paper on top of cookie dough, and roll until thickness is a scant 1/4-inch thick. If needed, lift top piece of parchment paper to check thickness of dough. Place rolled dough in refrigerator for about 15 minutes. While the dough is firming up in the refrigerator, make the filling (directions below).
Using a 1 1/2-inch cookie cutter, stamp out as many rounds as possible and transfer to baking sheets with a small spatula, knife, or other flat tool, being careful not to break cookies. (Note: Photo shows cookies made with a 1 1/2-inch cookie cutter, but if you prefer a larger cookie, you may use a 2-inch cookie cutter - though this will make fewer cookies.) Note: Gather scraps and roll again to 1/4-inch-thick, and cut more cookies, continuing this process until all dough is used up.
Place cookies about 2 inches apart on baking sheet, and bake for 7-9 minutes until just before edges begin to turn darker than rest of cookie and surface of cookies appear crackly. Allow cookies to cool for 1-2 minutes, then transfer cookies to a cooling rack. Once completely cooled, assemble cookies with malt-flavored filling (directions follow).
Filling
Wash out and dry your electric mixer bowl and return it to mixer. Add softened butter and malt powder and beat at low-medium speed until well blended (about 3 minutes). Add vanilla and confectioner's sugar and beat at low-medium speed just until well-blended.
Assembling Cookies
Transfer the filling mixture to a pastry bag with a 1/2-inch plain tip - OR - you can use a spoon to apply filling. Using pastry bag or spoon, apply a 1-inch round by 3/8" high mound of filling. (Note: If you are using a 2-inch cookie cutter, you'll need to apply more filling to each cookie.) Press another cookie on top of the filling-topped cookie, and gently press until the filling squeezes out to the edges of the cookie (do not allow the filling to squeeze out beyond the edges). Serve!
Store in an air-tight container at room temperature.